We provided the colours light beige and brown for you. But you can choose any yarn you like.
We use relatively thin yarn for a nice flat book mark. Want faster results? Use thicker yarn!
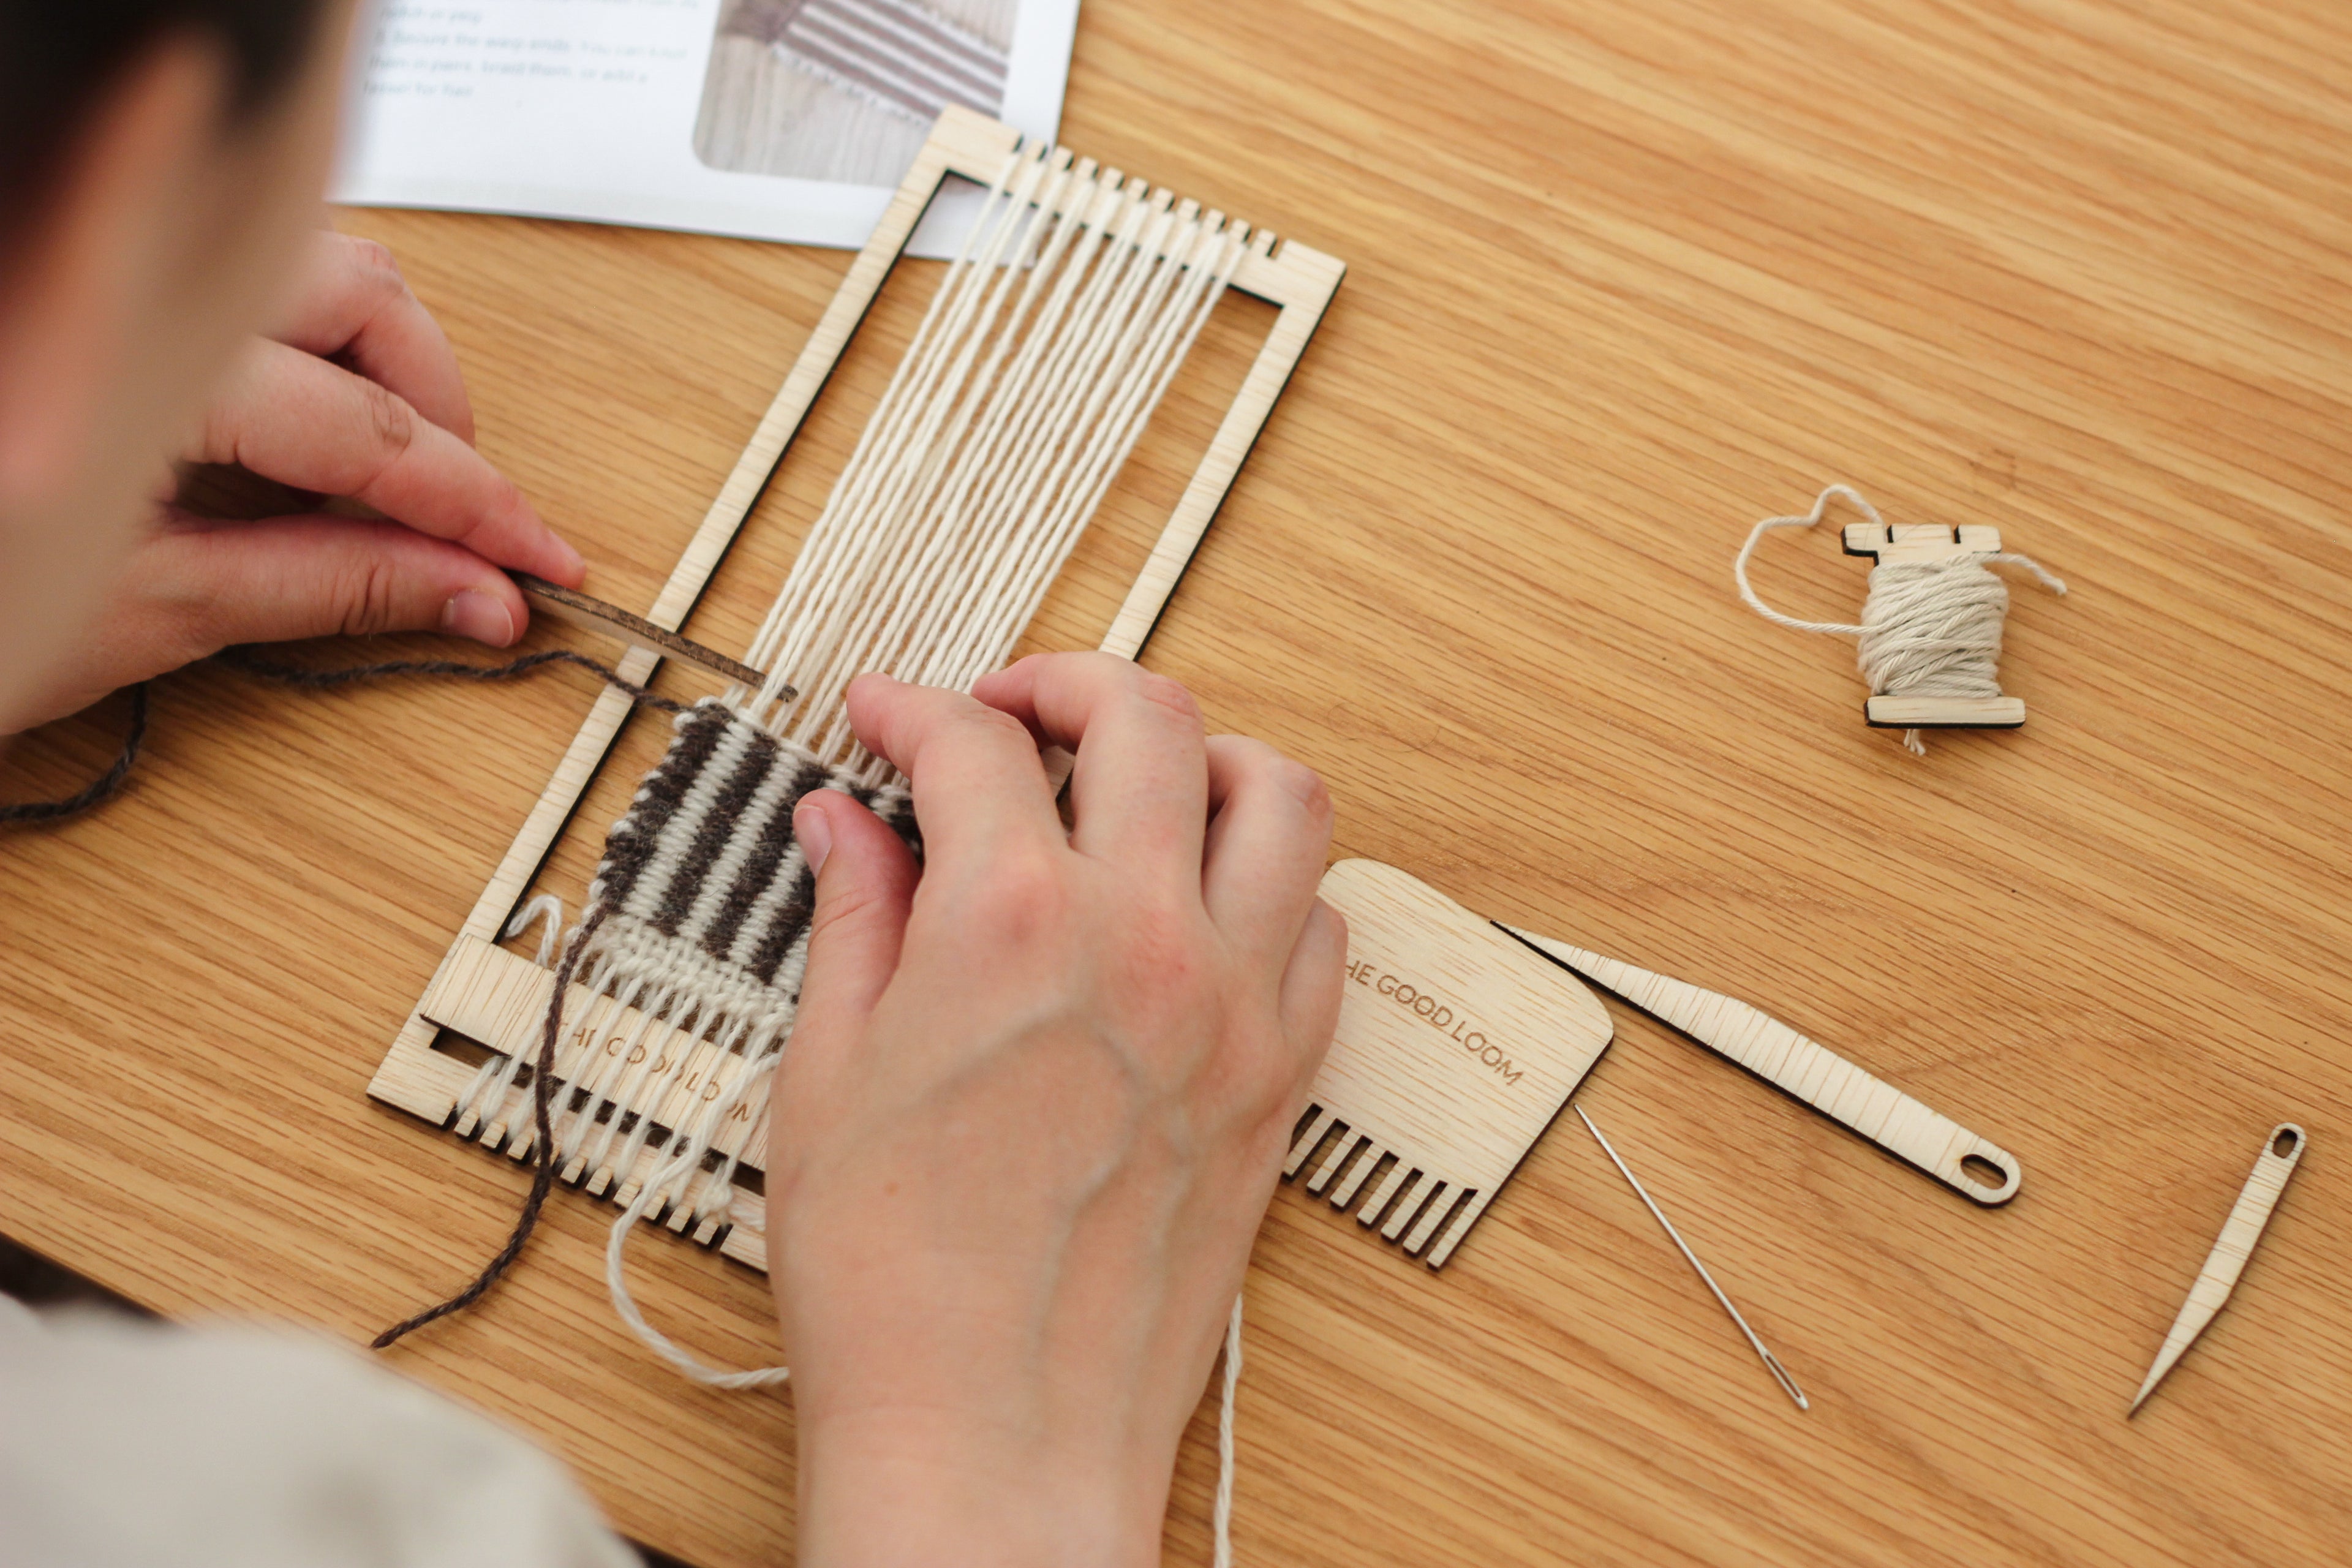
Wooden loom
The loom in the photos and videos can be a little different from your own loom. We improved the design to make softer edges.
Wooden needles
For this design you'll need two wooden loom needles. However, we got you some extra, just in case.
Wooden loom comb
This handy little comb will make your weave tighter and better!
Pair of little scissors
You'll need this to cut the yarn. Any scissors will do.
Threading needles / wool needles
To weave in the ends
Video tutorial: intro & materials
Good to know
You’ll want to have everything within reach so you can focus on crafting. Check the material list in the box on the left and make sure you find a nice space where you can craft. Light a candle, put on some music and get ready for a few hours of cozy crafting.
We use relatively thin yarn for a nice flat book mark. Want faster results? Use thicker yarn!
We give you an instruction for a striped book mark, but there's more yarn to experiment with different designs. It's recommended to watch the video for the striped book mark.
Work slowly and enjoy the process of repeating the same pattern over and over again. Make sure your yarn is not too tight on the edges. This is the most difficult part of weaving.
Step 1: setting up the loom
The warp is the vertical yarn that stays in place while you weave. This is also the colour of the fringe. You can choose to start with beige or brown. We'll start with beige in this example. Watch the video for instructions. The loom in the video might not be exactly the same as your loom. The technique is just the same!
Make a slip knot to secure the yarn on the bottom slot of the loom.
Wrap the yarn around the loom: Start at the bottom left slot and wrap upward to the bottom top slot. Wrap downward to the first slot again. Wrap upward to the second slot. Wrap downward to the second slot. Each slot has two strands. Repeat until you have 18 strands in total. Tie a knot on the last slot.
Adding a cardboard or wooden spacer
Use a piece of cardboard or a wooden spacer and weave it in the warp. One over, one under, one over, one under... etc.
Congratulations! This is your first weave!!
Weave with yarn
This is the most dificult part of your weaving project. Take your time, watch the video and pause where needed.
Once the wooden spacer is in place, secure about 50 cm of yarn on a wooden needle.
Insert the needle over one warp thread, under the next, and continue this pattern across the row. Pull the yarn through gently: Leave a 6-8 cm tail at the end which you’ll tuck in later. Use the wooden comb to make a nice horizontal line of yarn.
Now, you'll secure this yarn. Thread your needle where the warp is under the yarn. This will create an ‘x’ that secures the warp.
Make another row to complete the base. Comb after every row with the wooden comb.
Start your design
Now that we have the base of our yarn secured, we can make the striped design.
You made three rows of single weave as a start. Now we're changing the pattern a bit. For the next row, go over two, under two, over two, under two and repeat until the end of the row.
For the next row, we're changing colour! Take around 50 cm of the brown colour and secure to the the wooden needle. Go the opposite direction and the opposite of the pattern. This means that if you started with ‘over two’ in beige, you'll now start with ‘under two’ in brown.
Thread all your yarn through and leave a nice 6 - 8 cm tail at the end. Comb every row!
Weave & repeat
Once you get the hang of it, weaving is a really comfortable and repetitive process.
After your row in brown, go the opposite direction with the beige. Make sure that your two colours lock. This means that the brown yarn is closed in the little loop that the beige yarn creates when you start a new row.
If you run out of yarn, simply leave a tail of the old yarn and start the new one in the same row. You’ll tuck both tails in later.
Alternate the colours and pattern untill you have around 5 cm warp thread on your loom left.
Finish the weave
End with three single weave rows and secure the same way as you started your weave.
Weaving in the ends
After you are happy with the size of your book mark, you can weave in the ends. Weave it back into the last few rows using the metal threading needle. When all the tails are weaved in, cut the warp thread horizontally to release your book mark from your loom. Throw away the tiny bits that are left in the slots.